Decorative Metal Panels? 8 Pro Tips for Easy Installation!

Ever struggled with warping decorative panels or hidden rust creeping beneath your beautiful metal installations? You’re not alone. Many DIY enthusiasts and even professionals face unexpected challenges with decorative metal panels. But what if you could avoid these headaches with proven installation techniques?
Why Decorative Metal Panels Are Revolutionizing Modern Design
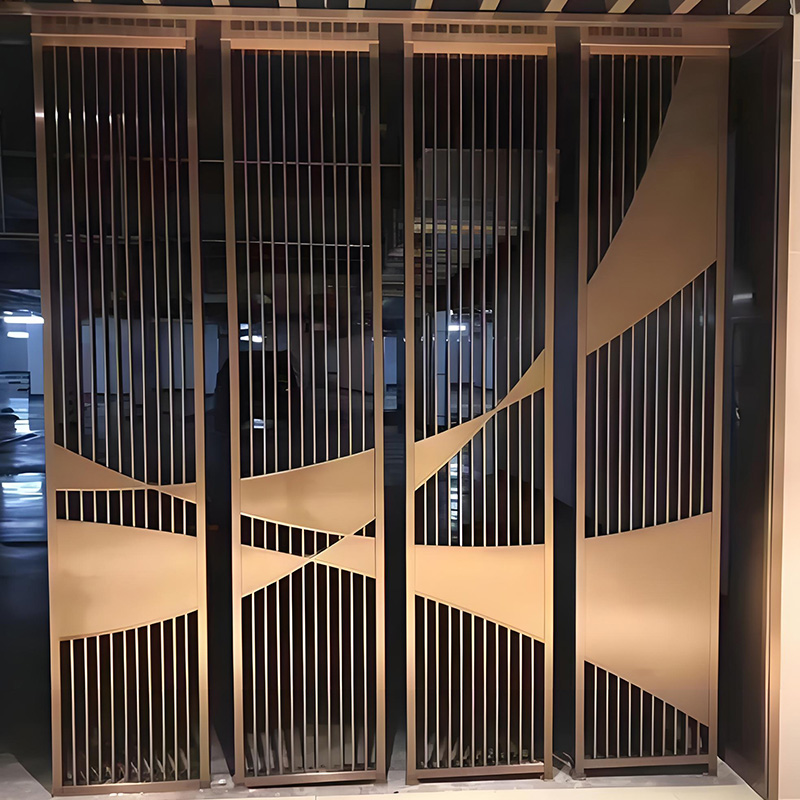
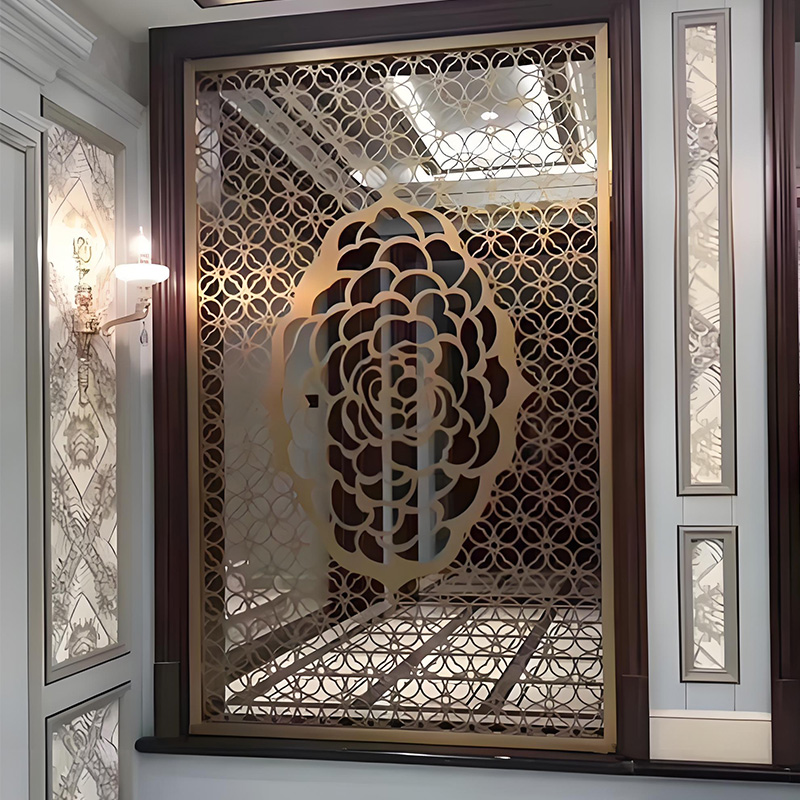
Decorative metal panels offer unparalleled versatility for both interior and exterior applications. From accent walls to statement ceilings, their durability and aesthetic flexibility make them a top choice for contemporary spaces. Unlike traditional materials, metal panels resist moisture, fire, and wear – but only when installed correctly.
The global demand for decorative architectural metal panels has surged by 24% since 2020 (Global Construction Review, 2024), highlighting their growing popularity in residential and commercial projects. However, improper installation remains the leading cause of performance issues.
Material Showdown: Choosing Your Decorative Metal Panels
Not all decorative metal panels perform equally. Your project’s success starts with selecting the right material. Aluminum excels in coastal areas due to its corrosion resistance, while steel provides superior strength for high-impact zones. New composites like SPC (Stone Plastic Composite) offer realistic stone aesthetics with enhanced durability.
| Material | Best For | Lifespan | Cost |
|---|---|---|---|
| Aluminum Panels | Coastal areas, curved surfaces | 40+ years | $$ |
| Galvanized Steel | Structural applications, harsh climates | 30-50 years | $$ |
| SPC Composite | High-traffic interiors, moisture zones | 25+ years | $$$ |
| PVC Panels | Budget DIY projects, temporary installations | 10-15 years | $ |
Pro Tip: For premium durability with authentic stone visuals, consider SPC decorative metal panels – our top recommendation for bathroom and kitchen installations.
Step-by-Step Installation Mastery
Preparation is Everything
Measure twice, cut once! Start by cleaning your substrate thoroughly – dust or oil residues cause adhesion failure. For wall applications, use a laser level to mark your layout lines. Gather essential tools: metal snips, drill with clutch control, corrosion-resistant fasteners, and quality sealant.
Framework Installation
Create your support structure using either wood battens (5×5 cm recommended) or metal channels. Space vertical supports 400-600mm apart for standard panels. Crucially, install a waterproof membrane behind exterior systems – this invisible layer prevents moisture damage to your substrate.
Panel Placement Techniques
Never force panels into position! For concealed clip systems, engage the panel’s edge fully into the previous piece before securing. Maintain 3-5mm expansion gaps at all junctions. When cutting decorative metal panels, use nibblers or electric shears – grinders create heat-damaged edges that corrode prematurely.
Securing Systems Compared
Choose your attachment method wisely:
- Exposed Fasteners: Quick but visible screw heads (use color-matched washers)
- Concealed Clips: Clean appearance allowing thermal movement
- Adhesive Installation: For smooth substrates only (follow manufacturer’s bonding requirements)
Finishing Like a Pro
Complete your project with color-matched trim profiles. Seal all penetrations and joints with UV-stable sealant – but avoid sealing bottom edges where condensation drainage occurs. Finally, remove protective film within 48 hours to prevent adhesive residue buildup.
Critical Installation Mistakes to Avoid
WARNING: 68% of metal panel failures stem from these preventable errors:
- Ignoring Expansion Gaps: Metal expands/contracts significantly with temperature changes. Always maintain manufacturer-specified clearance (typically 20-40cm intervals)
- Wrong Fastener Selection: Using standard screws causes galvanic corrosion. Always opt for compatible corrosion-resistant fasteners
- Improper Overlaps: Side-laps should follow local prevailing wind patterns – reverse them and you’ll invite water intrusion
- Grinder Cutting: Creates microscopic metal particles that embed in surfaces and rust. Use cold-cutting tools exclusively
Our team encountered this last issue in a 2025 luxury balcony project – decorative metal panels cut with grinders developed rust speckles within three months, requiring complete replacement.
Real-World Case: Transforming a Commercial Lobby
When a Seattle hotel needed a water-damaged feature wall replacement, we specified interlocking SPC decorative metal panels. The hidden-clip system allowed installation over uneven surfaces while accommodating the building’s seismic movement requirements.
Results: 3-day installation (70% faster than traditional stone), 30% material cost savings, and zero callbacks in 18 months despite high-humidity conditions.
Your Pre-Installation Checklist
✓ Confirm panel orientation (check grain directionality)
✓ Acclimate panels onsite 48 hours before installation
✓ Verify substrate flatness (max 3mm deviation over 1m)
✓ Plan fastener pattern to avoid “oil-canning” effect
✓ Seal cut edges with manufacturer-approved touch-up paint
✓ Install temporary protective coverings during construction
FAQs: Decorative Metal Panel Solutions
Q: Can decorative metal panels be installed over existing tile?
A: Yes – but only using specialty mounting systems that create a vented air gap. Direct adhesion traps moisture causing eventual failure.
Q: How do I prevent fingerprint marks on satin finishes?
A: Install with clean cotton gloves and use panel-friendly cleaners. Avoid abrasive pads that destroy protective coatings.
Q: Are metal panels suitable for fireplace surrounds?
A: Absolutely! Choose materials with appropriate fire ratings (most aluminum and steel qualify) and maintain required clearance to combustible materials.